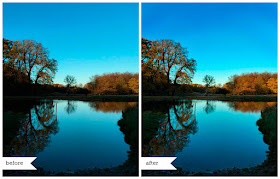
We enjoyed the late afternoon sun the other Sunday, walking across the park to the Hermitage Palace. We did not spot a deer - but I noticed a symmetrical reflection on the lake. The battery of my iPhone was low, so I took this photo with my husbands iPhone 6. I have edited it with my own iPhone 5S - using two photo veils from the mobile collection from Love that Shot.

Thereafter I opened the photo in Enlight photo application, and edited the grain and noise in the lake using the Denoise 40% -effect. After these slight basic edits, I opened the photo in Filterstorm application, and added two photo veils from The Mobile Collection.
This is how I proceeded - Photo recipe:
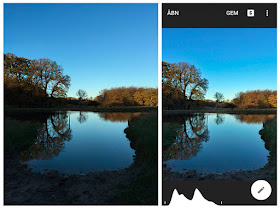
- I opened the photo in Filterstorm photo application in my iPhone.
- Choosing the "Edit"-option, and thereafter tapping the "+Image" icon, I was able to choose a photo veil called Belladonna, from the Mobile Veil Collection. Having saved the Mobile Veil Collection on my photo library of my iPhone, I easily can add the veils to my mobile photos. Filterstorm has a "Fit Image" option, that automatically fits the veil to your photo. So you do not need to worry, if you have a square veil and a rectangular photo - the app makes the veil fit perfectly your photo.
- I tried different blending modes - blending mode "Hue" would give a bright orange tone to the photo.
- Going for a more natural look, I chose blending mode "Soft Light".
- Filterstorm allows you to choose both the size of the brush both when masking and brushing.
- I added the veil using blending mode Soft Light, with 20 % opacity.
- Thereafter I brushed the veil effect from the tiny tree in the middle, using brush with 40 % opacity.
- After this, I added the mobile photo veil Privet, also from the Mobile Collection, using blending mode Soft Light with 15% opacity - brushing the veil again from the little tree in the middle.
I like to take photos with my mobile phone, and edit them as well with the photo apps and veils. My parents and family back in Finland do like to receive photos via e-mail and social media apps - "A picture is worth a thousand words".
Photo veils are available also in larger sizes - you'll find them by clicking this link to Photo Veil Collections by Love that Shot.
... Until next time, Nina


Gorgeous photos and a great tutorial.
ReplyDeleteThank you Michelle!
DeleteIt is easy and fun to edit the photos with your phone - and send them right away to the family far away!
The changes are subtle but very effective, Nina. Thanks for sharing.
ReplyDeleteAmalia
xo
Thanks so much, Amalia!
DeleteI will be peeking in to your creative blog, to be inspired to some Christmas DIY's - Have a great weekend!
great tips here -- thanks!
ReplyDeleteVery helpful for sure!
Hugs
Thank you Kristeen!
DeletePhotography is a lovely hobby - with all types of cameras ...
Sunshine to your weekend!
Nina